Tiling in Tallinn and Harju County
Precise tiling in bathrooms, kitchens, hallways and other areas.
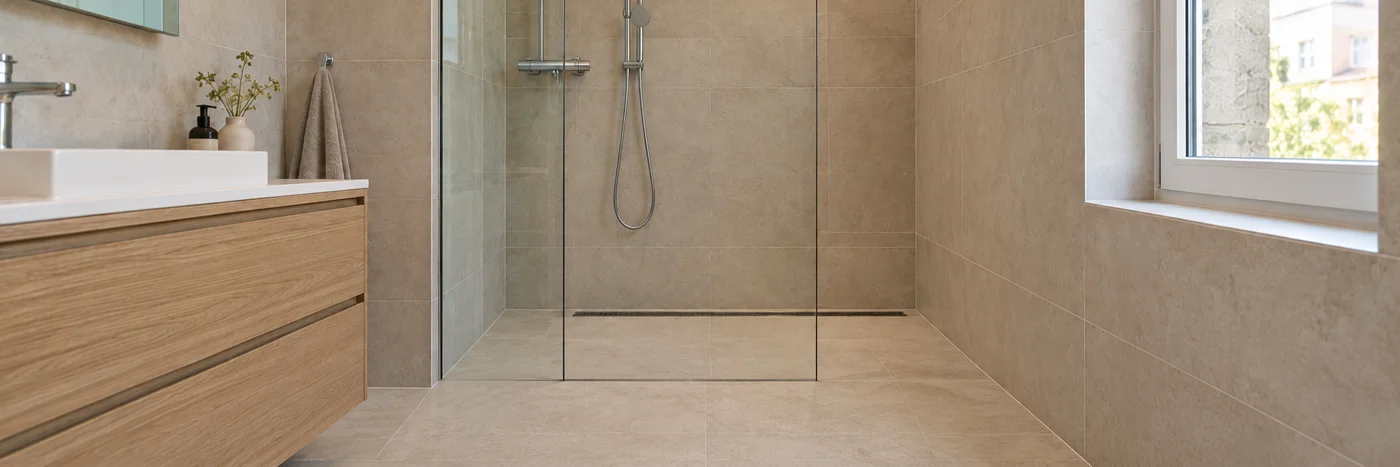
When planning tiling, we check substrate flatness, falls and waterproofing in wet rooms, and consider tile size and grout joint layout. This helps us estimate the scope of work and material consumption more accurately before starting.
Tiling begins with checking the substrate, because an attractive result depends on a flat, strong surface protected from moisture. We tile bathrooms, kitchens, hallways, utility rooms and other areas in Tallinn and Harju County where a durable, well-executed finish matters.
We help choose the right sequence of work, taking tile size, grout width, falls, drainage points and the room's usage into account. Our aim is for the surface to look good years later, as well as at handover.
What does the service include?
- tiling bathrooms, shower areas and toilets
- tiling kitchen splashbacks, hallways and floors
- selection of waterproofing, levelling materials and tile adhesive
- grouting, silicone sealing and edge finishing
When should you book this service?
Customers usually look for a tiler when a bathroom or kitchen needs complete renovation, old tiles have come loose or a new project needs a properly executed wet room. Good tiling reduces the risk of moisture damage and cracking later on.
Work process
Substrate inspection
We check moisture, strength and flatness, remove loose layers and correct uneven areas. In wet rooms, we plan waterproofing and penetrations before installing the tiles.
Layout planning
We mark cuts, visible edges and symmetry so the result is deliberate. For large-format tiles, we pay particular attention to surface flatness and the choice of notched trowel.
Finishing and inspection
After tiling, we grout, clean the surfaces and check edges, corners and silicone joints. We hand over the work with practical care recommendations.
Tiling quote
When preparing a tiling quote, we consider not only square metres but also the number of cuts, substrate condition, waterproofing needs, tile size and room shape. In bathrooms, drains, forming falls, the shower layout and penetrations affect the scope of work. For kitchen splashbacks, sockets, worktop height and visible edge finishes matter.
Our quality inspection covers consistent grout joints, tile flatness, corners, silicone joints and surface cleaning. If tiling is part of a larger renovation, we coordinate it with drywall, painting and plumbing so that newly finished surfaces do not need to be reworked later.
Local experience and agreeing the scope of work
In Tallinn and Harju County, tiling often involves apartment-building bathrooms, where space is limited, there are many penetrations and the sequence of work must be precise. When assessing an enquiry, we always consider access, whether the room is occupied, which surfaces need protection and a sensible sequence of work. This helps avoid having to reopen or repair a completed stage later.
Before starting, we provide a clear, realistic estimate. If photos are not enough, we arrange a site visit. This lets us agree on materials, timing, related work and potential risks before the project begins.
Tiling prices
According to our price list, labour for wall and floor tiling starts at 49 €/m²; including materials, prices start at 59 €/m². The exact materials included and how tile costs are accounted for are agreed separately in the quote. Substrate levelling, screeding to falls, waterproofing, demolition and plumbing are specified as separate stages of work. The final price depends on the substrate condition, scope of work and property requirements. See our current price list.
For a faster quotation, please include photos, measurements, the site location and your preferred deadline where possible. This helps us determine whether a site visit is needed or an initial estimate can be based on your description.
Practical information about tiling
Materials
Tiling quality depends on the substrate, moisture protection, tile type, adhesive and grout. In wet rooms, we use a system in which waterproofing, corner tapes, penetration seals and a suitable tile adhesive work together. Large-format tiles require an especially flat substrate, as even a slight curve quickly becomes visible in the finished surface.
Before tiling: plumbing and shower layout planning
Before closing surfaces, we agree the locations of the shower, basin, toilet and washing machine, along with water and sewer connections. Pipe connections are checked and the necessary tests carried out before covering them. The drain height must account for the entire floor build-up: substrate, levelling layer, waterproofing, tile adhesive and tile. Electric underfloor heating and other electrical work are coordinated with the appropriate specialist.
An exposed shower mixer sits in front of the wall, making its connections easier to access. A concealed or recessed shower mixer creates a clean, modern look, but the installation body, pipework and sealing detail must be selected before building the wall. We plan the installation depth and maintenance access required by the manufacturer. The choice of thermostatic mixer, hand shower and rain shower affects water demand, and the drain must be able to handle that volume.
Point drain, linear drain or wall drain?
A drain should not be chosen on appearance alone. Important factors include floor build-up height, sewer pipe position, drainage capacity, ease of cleaning and compatibility with the waterproofing system. The drain body is securely fixed, and its connection to the waterproofing uses the flange, collar or other seal specified by the manufacturer.

Point drain – a single drainage point in the floor
A point drain is a small square or round floor drain. It carries shower water into the sewer pipe below the floor. The picture shows a square drain in the centre of the shower area.
When the drain is in the centre, water flows into it from several sloping planes. Small floor tiles or mosaics follow these more easily; with large tiles, we plan cuts at the boundaries between slopes. The drain position is agreed before casting the floor.
Linear drain – a long drain in the floor
A linear drain, or shower channel, collects water through an elongated opening. It is installed in the floor, often beside the shower wall. The picture shows a channel with a tileable cover: its top is finished with a tile matching the floor, and water enters around the cover's edges.
A channel beside the wall often allows a single-direction fall and larger floor tiles. The channel can also be placed elsewhere, but this changes the falls. When choosing it, we check installation height, drainage capacity and how the grate and trap can be removed for cleaning.
Wall drain – an opening at the bottom of the wall
With a wall drain, the water inlet is at the bottom of the wall rather than a separate grate in the middle of the floor. The floor slopes towards this opening, and the drain body and connection sit within the corresponding installation system. This is not a linear floor drain mounted on a wall.
This solution is suitable when there is sufficient installation space in the wall structure and floor build-up. Waterproofing at the wall-to-floor junction and maintenance access are planned before finishing. Suitability for an existing bathroom must be assessed on site.
The drain images illustrate the basic approach. Actual falls, cuts and seals depend on the room and the selected product.
For example, hansgrohe RainDrain is a range of drainage products, not a generic name for all linear drains. The range includes different solutions, and we check each model's suitability against the floor height, connections and manufacturer's installation instructions.
Substrate preparation and screeding the floor to falls

After removing the old finish, we assess wall and floor strength, moisture, cracks and flatness. Loose layers and dust that prevents adhesion are removed. We level walls with a material suitable for wet rooms; for board-lined walls, we check structural stiffness, fixings and joints. Tile adhesive does not replace the necessary substrate levelling.
We form shower falls using a suitable screed or levelling compound before waterproofing. A self-levelling compound alone does not create the required fall. The solution may be a separate sloping shower area, a floor with several sloping planes or a surface falling towards a channel beside the wall. A well-planned doorway, shower screen and floor levels help keep water in the wet zone. The gradient and extent of the falls are determined by the design and drain instructions; we check for reverse falls and hollows that could collect water.
Primer, moisture barrier, waterproofing compound and sealing tape

Primer helps prepare a substrate for adhesion, but does not make it waterproof by itself. The general term ‘moisture barrier’ does not automatically mean suitable waterproofing beneath tiles either. In wet rooms, we select a complete system whose components are compatible with each other and with the substrate.
Waterproofing compound, or waterproofing mastic forms a waterproof layer beneath the tiles. At corners and junctions, we use the sealing tapes or corner pieces required by the system, collars around pipes and a suitable connecting component at the drain. Niches, thresholds and mixer penetrations also need carefully planned details. Layer thickness, consumption, number of coats and drying time follow the manufacturer's instructions; a uniform colour alone does not prove adequate waterproofing. A compatible waterproofing membrane system may be a suitable alternative.
Which tile adhesive should I choose?
The choice depends on tile material and size, the substrate, underfloor heating and where the tiles will be used. Ceramic wall tiles, dense porcelain tiles, glass mosaics and moisture-sensitive natural stone may require different products. We also check compatibility with the selected waterproofing.
- Cement-based adhesive: a common choice for walls and floors. C2 denotes improved adhesion; S1 and S2 describe deformability. Deformability matters for underfloor heating and large tiles, but the overall system determines the exact product.
- T and E markings: T means reduced slip on walls, and E means extended open time. F denotes fast setting, which requires careful planning of the work pace.
- Ready-mixed paste adhesive: is not a universal solution for wet rooms or floors. Its application must be checked in the product data sheet.
- White or specialist adhesive: for translucent mosaics and natural stone, we take colour and moisture sensitivity into account. Reactive adhesives are used for specialist applications according to the product instructions.
Tile layout, cuts and installation

Before bonding, we plan the tile layout: where rows start, where cuts fall and how grout joints align with the doorway, niche, mixer and drain. We consider the visible walls and floor together to avoid narrow strips accidentally ending up in the most prominent place. Starting with a full tile in one corner does not always give the best result.
Straight laying, staggered rows, herringbone and mosaics affect the number of cuts and the material allowance. For large tiles and staggered patterns, we also consider the tile's own curvature and the manufacturer's recommended offset. Grout width is chosen according to dimensional accuracy and application; even rectified tiles are not installed completely without joints.
Adhesive is applied with a suitably notched trowel and, where needed, to the tile's back as well. During installation, we check bonded coverage, flatness and differences between edges. A levelling system helps align tiles but does not fix an uneven substrate. Structural movement joints are not rigidly tiled over.
Grouting and silicone sealing

Grouting begins after the tile adhesive has cured as required and the joints have been cleaned. Cement-based grout is the usual choice; epoxy grout is suitable where greater stain or chemical resistance is needed. Epoxy requires precise timing and cleaning, and its suitability for the tile surface is also assessed.
Corners, junctions between different planes and movement joints specified in the design receive a suitable elastic seal. Sanitary silicone is selected for the surface and application; natural stone requires a suitable non-staining product. Neither silicone nor tile grout replaces the waterproofing beneath the tiles. During use, elastic joints should be kept clean and renewed when needed.
Mixers, shower screen and final inspection
Once finishing materials have cured as required, we install the agreed sanitary fittings and visible mixer components. Shower screen fixings are planned to minimise penetrations that could damage the waterproofing; necessary fixing details are sealed according to the instructions. We check drainage, joints, connections and the overall finish, and explain when it is safe to walk on the floor and use the shower. Underfloor heating is restarted gradually according to the selected system's instructions.
Time required
A small kitchen splashback can be completed quickly, but a bathroom usually needs several stages: removing the old surface, levelling, drying the waterproofing, tiling, grouting and silicone sealing. Drying times are part of quality, not a break in the work schedule.
Pricing factors
The price is affected by substrate condition, tile size, number of cuts, forming falls, niches, shower layout, extent of waterproofing and whether the property is an occupied apartment or an empty space.
Common mistakes
The most common mistakes are starting too soon on damp or uneven surfaces, poorly sealed penetrations, choosing the wrong adhesive and grouting or applying silicone before the surface has dried sufficiently.
Advice for customers
Before requesting a quote, send the room dimensions, photos, tile size and information about whether the old tiles need removing or the surface is already prepared. This makes the quote more accurate and the sequence of work more realistic.
Frequently asked questions
How much does tiling cost?
The price depends on the condition of the substrate, tile size, number of cuts, waterproofing and scope of work. We can give an exact price after reviewing the property or photos.
Do you also provide waterproofing?
Yes. In wet rooms, we install waterproofing where needed and check penetrations before tiling.
Do you install large tiles?
Yes. For large-format tiles, we consider substrate flatness, lifting, cuts and the appropriate tile adhesive.
Which areas do you work in?
Our main service area is Tallinn and Harju County, but we also inspect properties in other areas for larger projects.
Can new tiles be laid over old tiles?
Sometimes this is technically possible, but only if the old tiles are firmly attached, the surface is level and the moisture protection has been checked. In wet rooms, we generally prefer to remove the old finish, since hidden damage must be ruled out before applying a new finish.
Does tiling include grouting and silicone sealing?
Usually yes. The quote specifies whether the price includes tiling, grouting, silicone joints, waterproofing and substrate preparation, or only one stage of work.
When can I start using the tiled surface?
This depends on the adhesive, grout, room humidity and the manufacturer's drying times. The time before walking on the floor and using the shower is not always the same, so we provide specific instructions at handover.
Does the customer need to buy the tiles?
Customers can choose and buy the tiles themselves, but we can help assess the quantity, allowance and technical suitability. For large-format or textured tiles, suitability should be checked before purchase.
Is completed work covered by a warranty?
Yes. Construction and finishing work completed by RK Meistrid OÜ is covered by a 3-year warranty. The scope of the work and agreed terms are recorded in the quotation.
Is a linear drain suitable for every bathroom?
Not always. We need to check the floor build-up height, sewer position, drainage capacity and connection to the waterproofing. The drain model and position are chosen before forming the falls.
Does primer or a moisture barrier replace waterproofing?
Primer does not replace waterproofing. Wet rooms require a suitable waterproofing system beneath the tiles, including seals at corners, pipe penetrations and drains. The suitability of a product described simply as a moisture barrier must be checked in its instructions.
When should a concealed shower mixer be chosen?
A concealed mixer must be chosen before closing and tiling the wall, as its installation body requires a specific depth, suitable pipe connections and a sealing solution. The visible trim kit must fit the selected body.
Can shower floor falls be formed with large tiles?
Yes, if the tile layout and sloping planes allow it. Around a point drain, large tiles may need cuts at the boundaries between slopes. A linear drain beside the wall may allow a single-direction fall. The solution is decided before buying the tiles.
What should I include in a quote request?
Include photos, wall and floor dimensions, tile size and material, the property location and your preferred deadline. State whether you need removal of the old finish, plumbing, drain replacement, screeding to falls, waterproofing or a concealed mixer.
What other work is tiling usually connected with?
Bathroom and kitchen tiling is often part of a larger sequence of work. The substrate must be level and moisture resistant before tiling, so many properties also need preparation of wet room walls and ceilings or removal of old finishes. If tiling is part of a complete apartment renovation, it is also worth assessing the subsequent interior finishing work and reviewing indicative tiling prices.